RANE SEVENTY
SETUP
Firmware & Drivers
Firmware: There is no firmware update available at the time this manual was written, but it's a good practice to check for updates at Rane Dj Downloads
Drivers: Install the latest drivers (for both Windows and MacOS X computers) from Rane Dj Downloads
VirtualDJ Setup
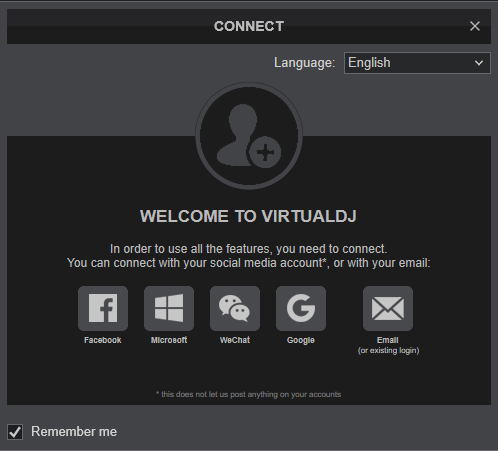
Once VirtualDJ is launched, a Login Window will appear. Please login with your preferred method from the ones provided.
A Pro Infinity or a Pro Subscription License is required to fully use the Rane Seventy.
Without any of the above Licenses, the controller will operate for 10 minutes each time you restart VirtualDJ.
Buy a license
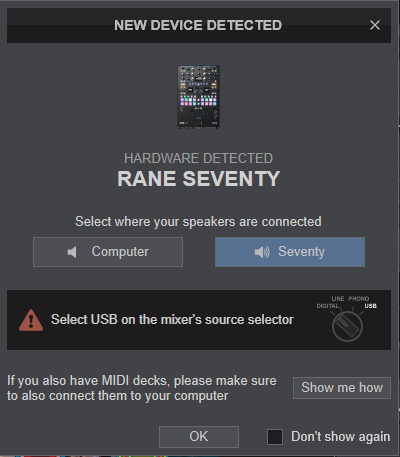
Click on the "Seventy" button in order VirtualDJ to apply the pre-defined audio configuration for your device. Keep in mind that due to the nature of the device, speakers need to be connected to the Master Output of Seventy and the pre-defined audio configuration has to be used.
Make sure you have the top-panel Source selectors to USB-A or USB-B depending on the USB port you connected at the rear panel.
Click to OK.
MAPPING
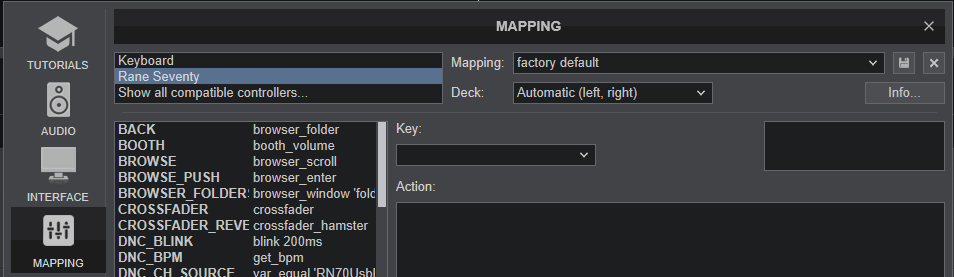
The unit should be visible in the MAPPINGS tab of Config and the “factory default” available/selected from the Mappings drop-down list. The factory default Mapping offers the functions described in this Manual, however those can be adjusted to your needs via VDJ Script actions.
Find more details at VDJ Pedia
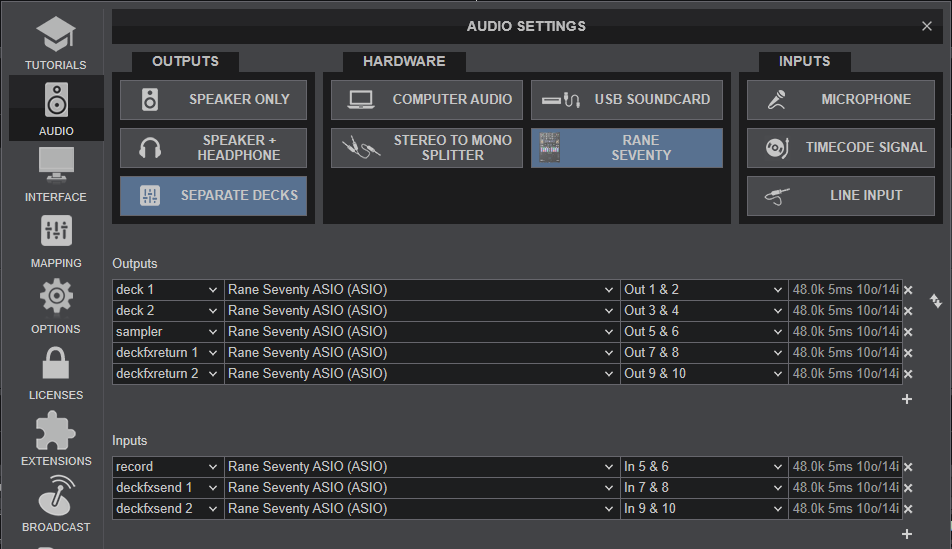
AUDIO Setup
The unit has a pre-defined Audio setup and a special button in the AUDIO tab of Config to provide that. Alternative Audio setups can be applied in the same window. See Advanced Setup for more details.
For further software settings please refer to the Manuals of VirtualDJ
LAYOUT
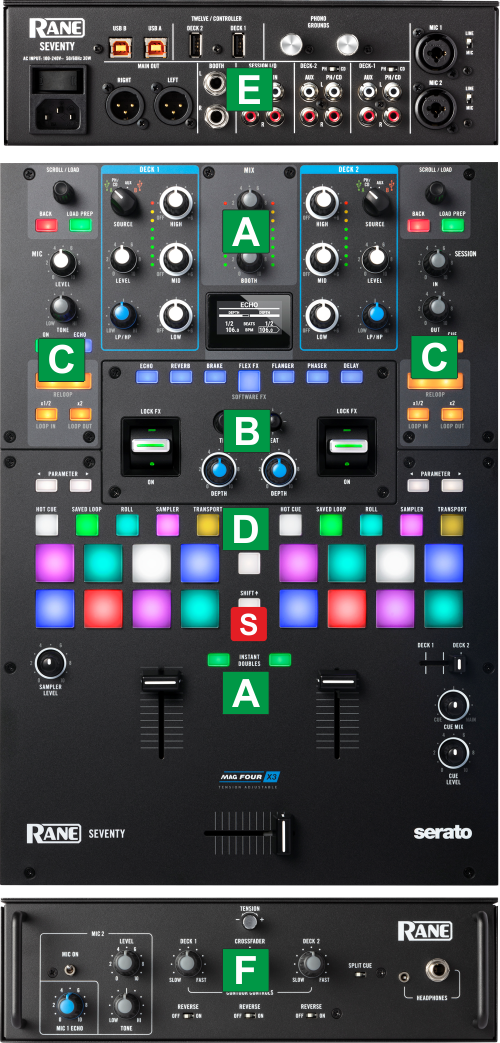
The functionality of each button, knob and slider per section (as shown in the image above) will be explained in detail in the next chapters
S SHIFT Hold this button down to access secondary functions of Rane Seventy as described in this manual
A MIXER & EQUALIZER
B EFFECTS
C BROWSER & LOOP CONTROLS
D PADS
E REAR
F FRONT
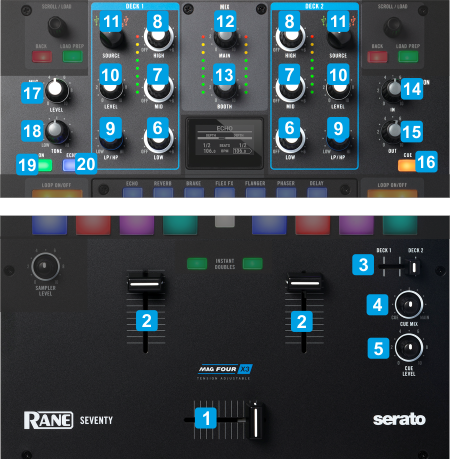
MIXER , EQUALIZER & OTHER IN/OUT CONTROLS
KEY
ACTION
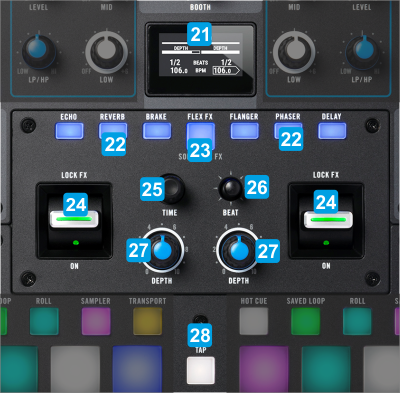
EFFECT CONTROLS
The Rane Seventy offers the ability to apply Hardware (Flex) and software (VirtualDJ) Effects on left/right mixer channel.
Use the FLEX/SOFTWARE FX button to toggle between the 2 modes. Arm/Select the Effects you wish to trigger via the 6 labeled buttons, then use the latch on/off-temporary switches to apply the armed Effects to left/right mixer channel. All the information about the Effects will be displayed on the LCD of the Rane Seventy.
KEY
ACTION
SHIFT (SECONDARY) ACTION
Use these buttons to arm/select the Hardware effects you wish to turn on/off. All 6 Hardware Effects - as printed on silkscreen - can be enabled on both mixer channels, but it's a single selection, so only one can be selected/armed and enabled each time.
In Software FX mode:
Use these buttons to arm/select the VirtualDJ Effects you wish to turn on/off. The left 3 buttons represent the 3 VirtualDJ FX slots of Left Deck and can be applied only to Left Deck, while the 3 right buttons represent the 3 VirtualDJ FX Slots of Right deck and can be applied on Right deck only. All 3 Effects per Deck can be armed and enabled at the same time
Enable a mode where the Parameters of the Hardware Effects can be changed
In Software FX mode:
Enable the Selection mode (led will blink). When enabled, use the TIME encoder to select a different Effect on the FX slot that this mode is enabled.
Move the joystick left/right to select which side the BEATS and the Joystick will affect (notice the arrow on the LCD)
BROWSER & LOOP CONTROLS
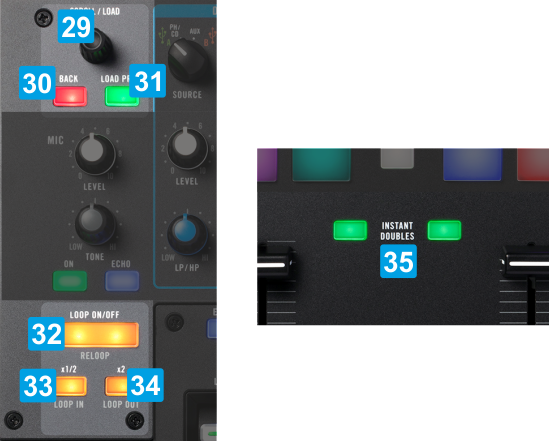
KEY
ACTION
SHIFT (SECONDARY) ACTION
Push to load the selected track to Left/Right Deck
Push to toggle Browser focus between Songs list and Sideview
Performance Pads
The 8 RGB Pads offer various functions, depending on the selected Pad mode. Each of the 5 Pad mode buttons offers 2 individual modes. Press a pad mode button once to access it's primary mode, and press it again to access it's secondary mode. The modes represent a page of the PADS section on the default VirtualDJ GUI.
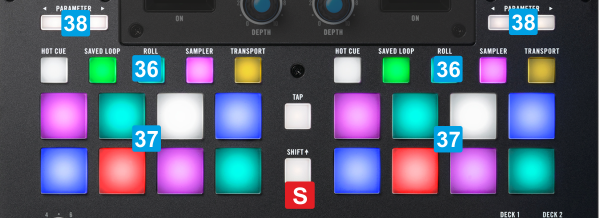
KEY
ACTION
SHIFT (SECONDARY) ACTION
Primary modes (1st press): Hotcues, Saved Loops, Loop Roll, Sampler, *Transport
Secondary modes (2nd press) : Cue Loop, Manual Loop,Loop, Sampler Velocity, Slicer
* Transport mode
When the Transport mode is selected, a special TRANSPORT 70 page will be selected for Pads, offering basic transport Deck controls. This page will be available only when the Rane Seventy is connected.
REAR PANEL
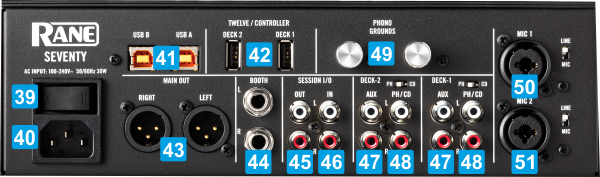
KEY
ACTION
Please make sure that you have made all the necessary connections on the back of the unit before turning it's power ON.
You can connect up to two computers by using the two ports of the device (labeled USB A and USB B).
Make sure that you turn the channel CH INPUT SWITCHES at the top panel to the correct USB port for software mixing.
Attention: When you connect a device on the PH/CD RCA plugs make sure that you also switch the PH/CD switch on the appropriate position depending on the device you have connected. Failing to do so may result in heavy distortion or a very weak signal of the analog source.
For DVS (Timecode), set the top-panel Input Source switches to USB
FRONT PANEL
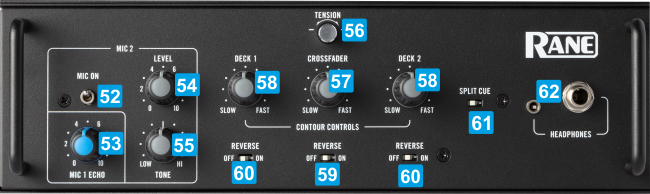
KEY
ACTION
ADVANCED SETUP
Timecode (DVS)
VirtualDJ is offering DVS (Digital Vinyl System) support for the Rane Seventy. A Pro Infinity license is required. 2 Timecode Inputs are available to control any software decks via Timecode CDs or Vinyls.
Both Mixer Channels can accept LINE (Timecode CDs) or PHONO Sources (Timecode Vinyls) depending on the CD/PH switchers at the rear panel of the unit.
- Connect your Timecode devices at the rear panel of the Rane Seventy
- Open VirtualDJ configuration window and select the AUDIO tab on the left
- Click on the "TIMECODE SIGNAL" button to enable the timecode inputs
- Your sound setup should be like the one shown on the following image:
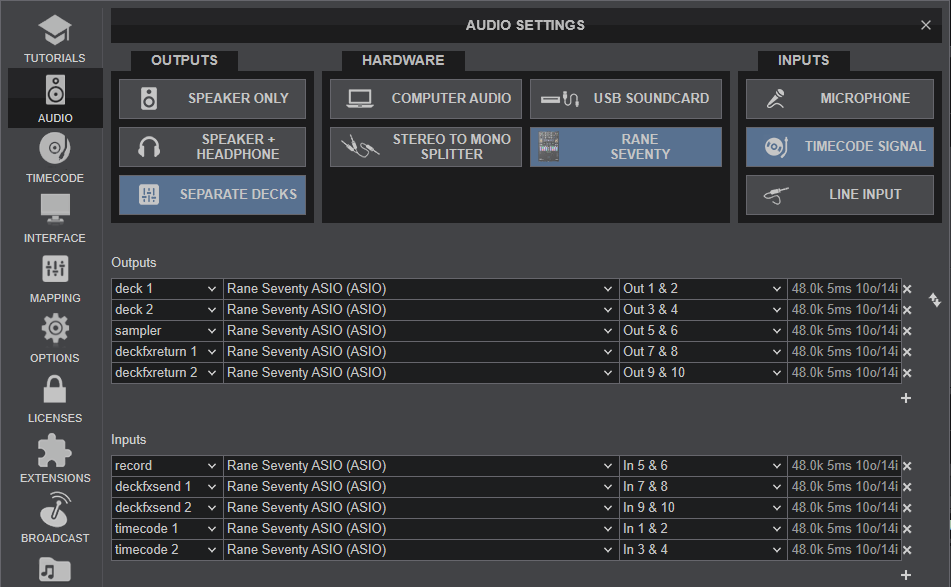
Rane Seventy Sound Configuration with Timecode Inputs Configured - Click on "Apply" button
- Click on the TIMECODE icon on the left side of configuration window.
- Press PLAY on your timecode CD or Vinyl device and VirtualDJ will automatically detect your Timecode type and make the appropriate adjustments for best performance.
- Click on the ON buttons from the TIMECODE panels of the Default Skin (in the SCRATCH center panel) to enable the Timecode control to any of the 4 software decks.
- Press PLAY on your timecode CD or Vinyl device and VirtualDJ will automatically detect your Timecode type and make the appropriate adjustments for best performance.
- Press the CALIBRATE button if for any reason the signal is not detected (possibly due to reversed phase connections).
Back to back
The Rane Seventy has two USB ports, allowing simultaneous connection of two computers. Each port is completely independent. It is possible to run VirtualDJ on one computer and any other DJ-software on the other, Mac or PC.
How to:
- Connect the 2nd computer to the unused USB port on the Seventy.
- Switch the Input Source of the non-playing mixer channel to the USB source of the 2nd computer.
- Play a track on this deck and mix it when ready – you ll now have audio from both computers during the mix.
- Fade out the audio playing from the 1st computer to the audio playing from the 2nd one.
- When only audio from the 2nd computer is left in the mix, remove the first computer.
- Assign the Input Source for the remaining free mixer channel to the 2nd computer and keep mixing.
Recording
The Rane Seventy has a dedicated Input to record your Main Mix. VirtualDJ has pre-configured this input for recording, thus no special setting is required in order to record your mix (including analogue sources and Microphone).
Use the REC or BSCAST buttons from the MASTER center panel of the VirtualDJ GUI to Record or Broadcast your mix.
